Overview
There were already programs out there to create disk images for the SInclair Spectrum +3 with a disk emulator like the Gotek interface. I liked the z80onDSK written by Tom Dalby but it is a command-line driven program and has limitations which would mean all files must be in the same directory, filenames cannot have non+3DOS friendly characters (which is most snapshots) and the resulting argument line was often huge once you added special switches and options. Add to this the difficulty of knowing how many snapshots would fit in the disk image, I was inspired to write a GUI that would also handle many of the processes with relative ease.
My program works with Tom’s z80onDsk engine. it must also be present for this program to work as the final disk image is compiled by it. I have inlcuded Toms program in the setup files in case you cant find it and it will be placed in the correct folder automatically.
Download the setup file from here and install on your PC – the program may require admin rights because of the need to create files etc.
Z80toDSK GUI Setup Download Link
Tom Dalby’s z80onDSK homepage.
Step 1
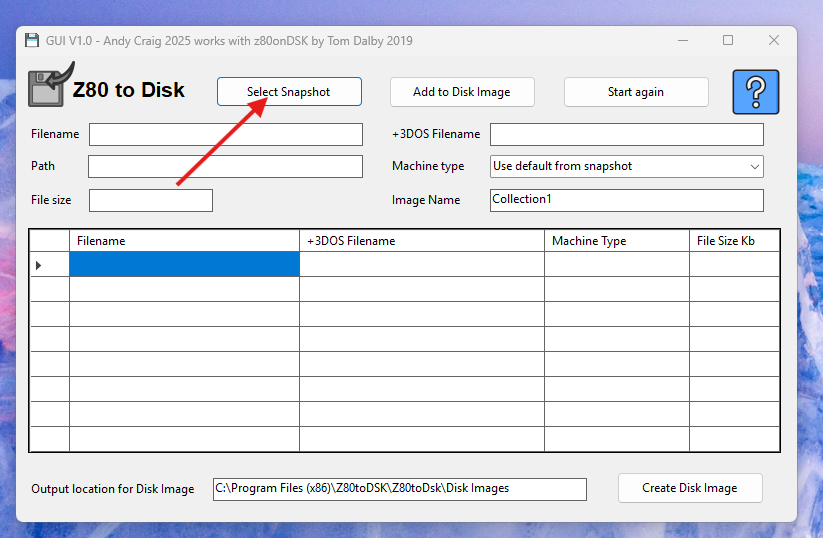
Start by Clicking on ‘select snapshot’ to open the file browser.
Step 2
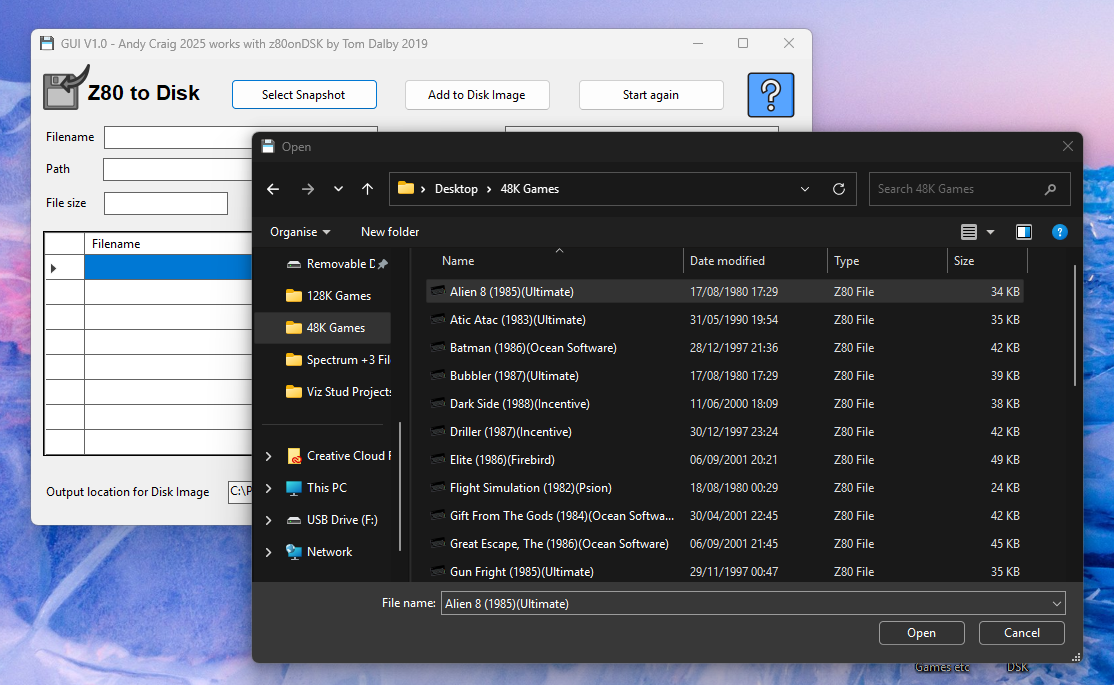
Browse to where your chosen snapshot files are. They must be in the ‘.z80’ format to work. Click your chosen file and then ‘open’. Snapshots can be 48K or 128K.
Step 3

Now you can see the snapshot details have been entered into the relevant boxes. The snapshot will almost always be a ‘non +3DOS friendly’ name with spaces and characters that are not allowed on a +3 disk. The name has been shortened to 8 characters and any spaces and illegal characters removed for you in the +3DOS Filename box but you can edit this yourself as long as you dont go over 8 characters.
Step 4
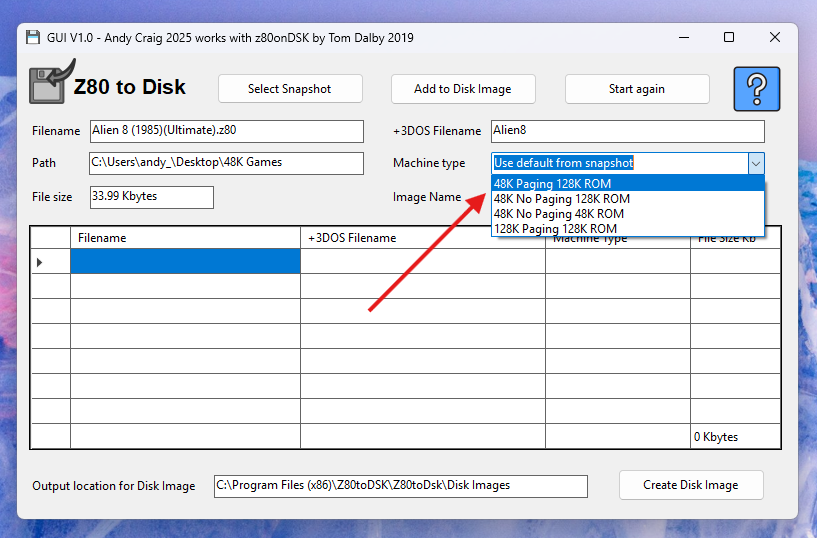
Some snapshots require special settings to function. Ultimate games are a good example as they will not run unless RAM paging is disabled when using the 128K ROM. In this case you would choose option ’48K No Paging 128K ROM’ When you are happy with the settings click the ‘Add to Disk Image’ and it will appear as the first entry in the table. You can now add more snapshots in a similar way.
Step 5
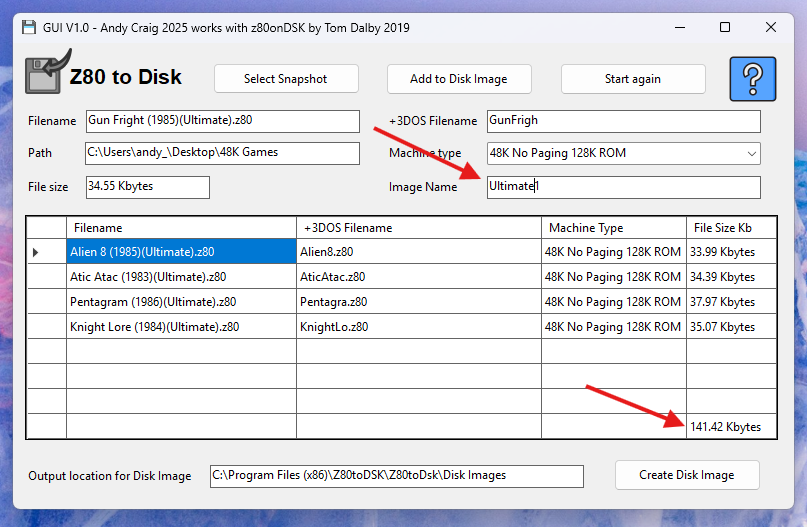
Notice that you have a running total of Kbytes used in the image so you know how many snapshots you can fit. You may also want to edit the Disk Image name to distinguish it from other disk images you have created. If you want to delete a snapshot from the image simply click on it in the table and you will be asked to confirm its deletion.
Step 6
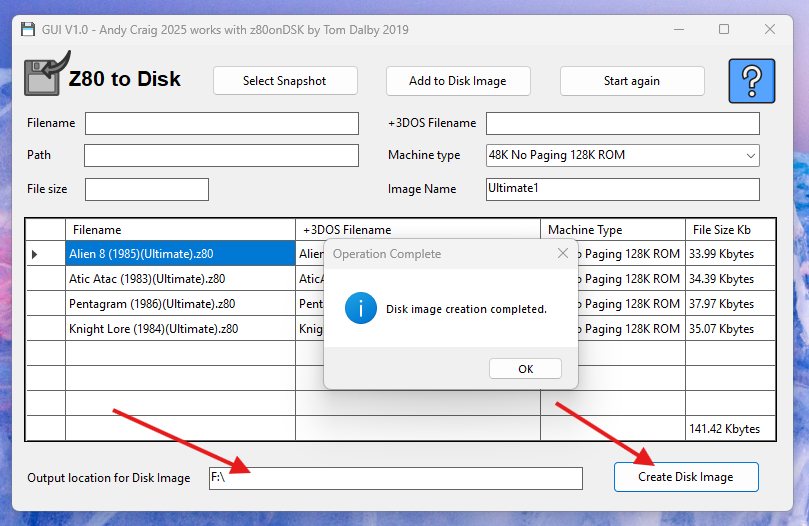
Now that you are ready to create the Disk Image, check the output location. It defaults to a folder on your PC but you can double-click the path to choose another location. In this example I chose my F:\ drive (which is the USB stick) to output the image directly to the memory stick for use in my Gotek drive. After you click ‘Create Disk Image’ there will be a short delay whilst your image is created.
Your Image will be created.
When you click the ‘Create Disk Image’ button a number of operations will take place.
1. All your chosen snapshot files will be copied to a temporary working folder leaving the originals untouched.
2. The filenames will be changed to suitable +3DOS names
3. The argument command-line string will be built including any special switches you have chosen like RAM paging etc.
4. The argument string will be passed to the program z80onDSK by Tom Dalby and the image will be created with your chosen name and sent to your chosen output path.
5. All temporary files will be cleaned up ready to make your next image.
When you place your USB stick in a gotek drive, from this point on credit goes to Tom for creating a Loader that you can run called DISK and you will see a small loader menu. You can also just hit loader from the +3 menu.
If like me you also have an internal IDE drive and +3e ROMS, you can copy the files from the Disk Image to your IDE drive. If snapshots don’t need any special settings they will run from there using the ‘SPECTRUM’ command otherwise use the loader.
Help
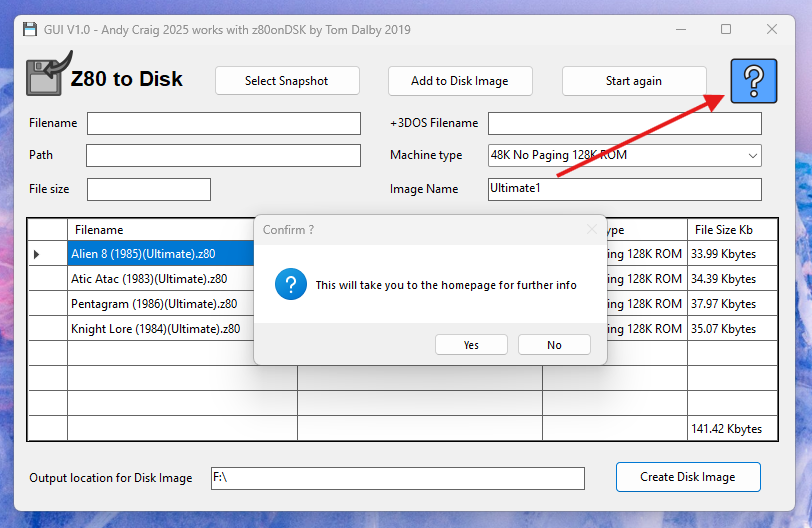
Double-clicking the help icon will bring you back here.
Contact:
I hope you find this useful, I created it purely to make my own life easier and it sort of grew from there. If you need or want to contact me for any reason z80@arcsolo.co.uk
Version History:
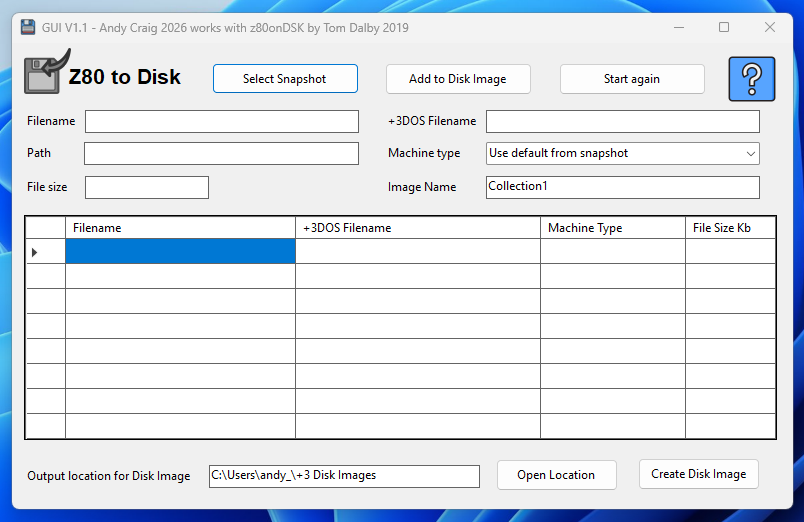
V1.1 – Changed the default disk image location to the users home folder under ‘+3 Disk Images’. Added button near output path to open the output folder. Fixed broken application icon.
I’m working on a new version to go with Tom’s new version that has a better Disk Image Menu and no screen corruption that happens with some snapshots. It can also output disk images in a variety of formats.